So yesterday I posted some pictures of my blog about Mr K -who(dagnabbit!) captured my sweet littlest Monkey's heart and attention.
Well, I posted those pictures straight out of the camera.
Which I should not have, but I did.
I know that there are these talented people who take the most amazing pictures in composition and with a trained and artistic eye, and then they get on Photoshop, and they can make that photo EXACTLY what they imagined in their minds as the shutter flew!
They are artists!
But poor, pitiful me! I do not have Photoshop any longer.
My free trial ran out.
And even during the trial, I had NO IDEA how to use it!
Would you like to see the fruit of my efforts?
The original:

Ok. Cute, sweet baby! But there is some work that needs to be done, she looks blue, and poor sweetie has some of that baby acne stuff going on.
So here is MY first attempt at Photoshopping the picture:
 Do you see the difference?
Me neither. For everything I did, there did not seem to be any change at all.
Effort 2:

Do you see the difference now? No?
Not surprised. I can't find a difference either.
I think I am not very good at this.
So I called my OOBER-TALENTED sister
(who just so happens to have this whole photoshop thing down, you know) and the result took my breath away!
 I have NO IDEA how she pulled it off! But all the baby acne is GONE, her skin is rosie and lovely, and her eyes are even more twinkly!
That is worth another look!
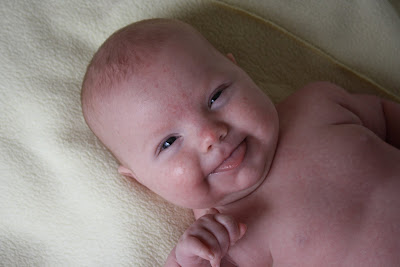 Beautiful!
Here is what she did in Black and White:
 Lovely!
You can see the family pictures she took of my family and me HERE and HERE.
Now, I am inept at Photoshop, but there are a lot of things that you can fix with simple Windows Media.
So here is the photo of Mr K straight out of the camera as you saw it in THIS post:

Ok, we can see that there needs to be some work done. Here it is on my laptop.
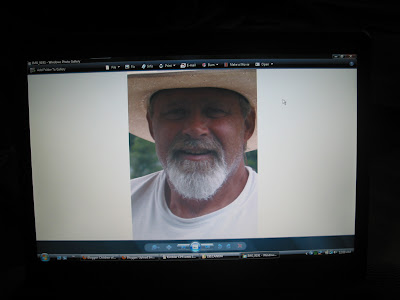
My poor laptop sure gets a workout!
First head to the "Fix" at the top left-hand corner of the viewing screen.
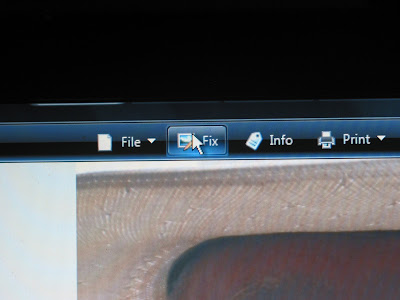
Now, you all may wonder WHY I am walking you all through it! Well, I am guessing that there are people who read this blog who are just like me. And I, for all my intelligence (no comments from the peanut gallery!) had all this on my computer for THREE YEARS, and JUST realized THREE WEEKS ago that I could actually DO something with it!
So those of you who have gotten all this figured out, sit back and watch all the rest of us "Ooooh!" and "Ahhhh!" at the discovery. Just laugh where we can't hear you, OK?
I HEARD that!
Back to business.
Now a menu will drop down on the right.
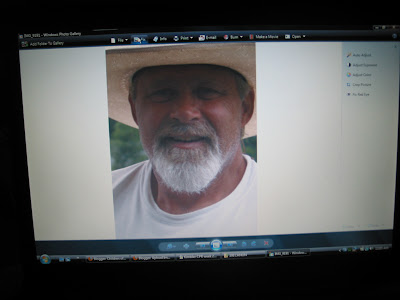
It looks like this:
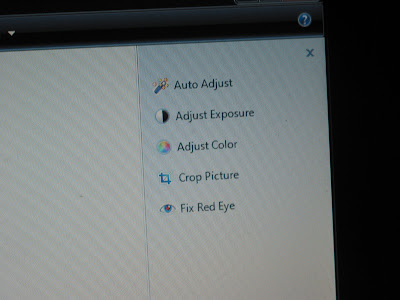
With Mr K's picture I decided to start with the "Auto Fix" option. Sometimes it makes the picture just perfect.
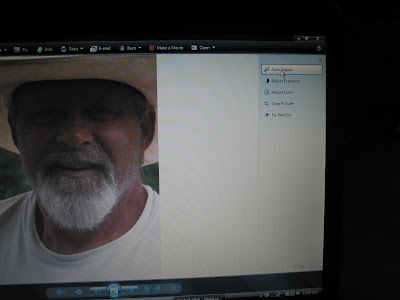
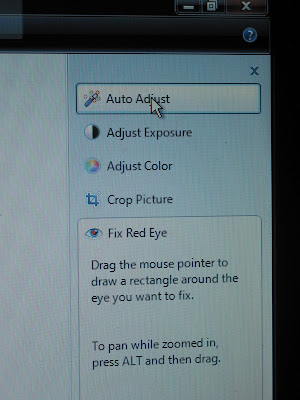
Here is the result:
 AAACK! I think it made it worse!
Mr K looks like he has been holding his breath for WAY too long!
Back to the drawing board.
So first I pulled up the "Adjust Exposure" option:
 I bumped up the contrast just slightly, and simply nudged the brightness down. Not shown in this picture, since I took it AFTER the fix, and I did not want to mess up what I had just done!
Next I picked the "Adjust Color" option:
 Now, I went up in the color temperature, making the picture a little warmer. Mr K is actually that tanned and dark from being in the sun, so it was appropriate.
Next, I nudged (there is that word again) the saturation to the right. You really don't want too much of this one, but a little bit can keep a picture from being too washed out!
Here is the result!

Not surprised. I can't find a difference either.
I think I am not very good at this.
So I called my OOBER-TALENTED sister
(who just so happens to have this whole photoshop thing down, you know) and the result took my breath away!
 I have NO IDEA how she pulled it off! But all the baby acne is GONE, her skin is rosie and lovely, and her eyes are even more twinkly!
That is worth another look!
Beautiful!Here is what she did in Black and White:
 Lovely!
You can see the family pictures she took of my family and me HERE and HERE.
Now, I am inept at Photoshop, but there are a lot of things that you can fix with simple Windows Media.
So here is the photo of Mr K straight out of the camera as you saw it in THIS post:

Ok, we can see that there needs to be some work done. Here it is on my laptop.

My poor laptop sure gets a workout!
First head to the "Fix" at the top left-hand corner of the viewing screen.

Now, you all may wonder WHY I am walking you all through it! Well, I am guessing that there are people who read this blog who are just like me. And I, for all my intelligence (no comments from the peanut gallery!) had all this on my computer for THREE YEARS, and JUST realized THREE WEEKS ago that I could actually DO something with it!
So those of you who have gotten all this figured out, sit back and watch all the rest of us "Ooooh!" and "Ahhhh!" at the discovery. Just laugh where we can't hear you, OK?
I HEARD that!
Back to business.
Now a menu will drop down on the right.

It looks like this:

With Mr K's picture I decided to start with the "Auto Fix" option. Sometimes it makes the picture just perfect.


Here is the result:
 AAACK! I think it made it worse!
Mr K looks like he has been holding his breath for WAY too long!
Back to the drawing board.
So first I pulled up the "Adjust Exposure" option:
 I bumped up the contrast just slightly, and simply nudged the brightness down. Not shown in this picture, since I took it AFTER the fix, and I did not want to mess up what I had just done!
Next I picked the "Adjust Color" option:
 Now, I went up in the color temperature, making the picture a little warmer. Mr K is actually that tanned and dark from being in the sun, so it was appropriate.
Next, I nudged (there is that word again) the saturation to the right. You really don't want too much of this one, but a little bit can keep a picture from being too washed out!
Here is the result!

Well? What do you think?
Before:
After:
I like that one much better!
See I CAN do this "fix-it" thing!
This is a really easy way to fix pictures without the expense of Photoshop and the training needed to be really effective at it! Now of you want to make this a profession, you are going to need much more than Windows Media, but for the shutterbug, this can really be a lifesaver for your favorites that need help, and give your pictures a new dimension.
I like this also because you can fix red eye:
Before:
After:
I like that one much better!See I CAN do this "fix-it" thing!
This is a really easy way to fix pictures without the expense of Photoshop and the training needed to be really effective at it! Now of you want to make this a profession, you are going to need much more than Windows Media, but for the shutterbug, this can really be a lifesaver for your favorites that need help, and give your pictures a new dimension.
I like this also because you can fix red eye:
 When I found this particular feature I went through all my old pre "natural-light-love-affair" days and fixed them all!
And crop pictures too:

So, you can use this feature if you just cannot figure out how to make Photoshop work for you, or if you are cheap, married to someone who is cheap, or an expensive program like that is not in the budget for you. Make the best use of Windows Media, and you might be able to make your photos pop!
Just don't forget THIS amazing, and TERRIBLY important button!
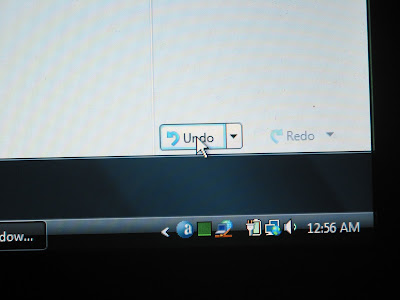
Located in the bottom right-hand corner of your window, make this little puppy your friend.
Simply click repeatedly to undo multiple steps!
And then have some fun!
Just don't forget THIS amazing, and TERRIBLY important button!

Located in the bottom right-hand corner of your window, make this little puppy your friend.
Simply click repeatedly to undo multiple steps!
And then have some fun!


